
 Gloves
 Jerseys
 Gear
Gear
 Brands
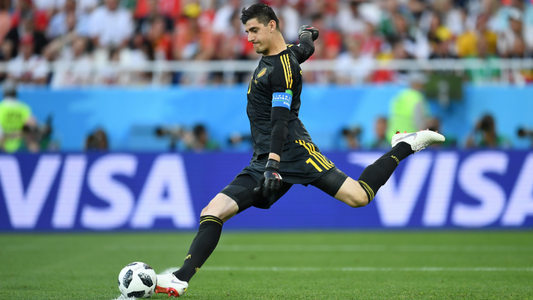
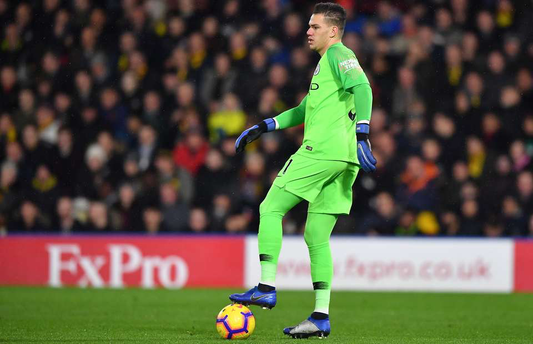
Goalkeepers are now required to be just as good with their feet as outfield players. Keepers like Alisson, Ederson and Pickford, from the Premier League are able to recieve the ball to feet and not panic. They can strike a ball 75 yards easily. The soccer game has evolved into a more possession based sport and the keeper plays a vital role with their distribution ability. A keeper now has to be comfortable receiving the ball, to feet, under pressure. Use the drills in these articles and videos to become like social media star The Modern Day GK.
Goalkeeper Distribution
Soccer Goalkeeper Distribution, Handling, and Diving Drills
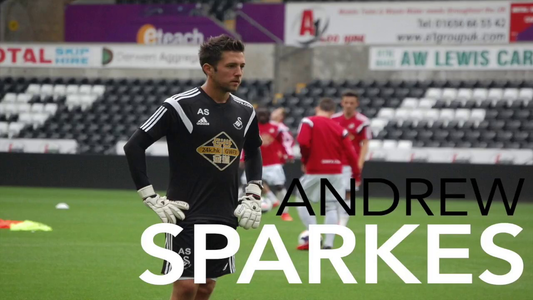
Goalkeeper Distribution Training Progression with additional emphasis on catching and diving. Courtesy of International Goalkeeper Coaches Conference and Andrew Sparkes.
Keeperstop.com Youtube video links that progression a developing goalkeeper through different catching and distribution drills.Goalkeeper Drill 1: Simple and effective bowling distribution exercise with both hands. Goalkeeper recovers in line for a volley. Goalie should focus on quality distribution and then finding the correct line with the server
Progression 2: Goalkeepers distribute to opposite side, find proper angle, and are in ready position early for a shot. Serving goalkeepers working on distribution as well.
Progession 3: Goalkeeper quickly distributes to goal or target. Goalkeeper fights to get into the proper saving position, balanced, with hands ready. Quick step and change of weight over the inside leg helps the body to respond and control the body for the collapse diving save. Leave the save for the next goalkeeper, Restand, and quick footwork out of the way.
Progression 4: Coaching points will still focus on distribution and for this progression low driving saves. Goalkeeper quickly distributes to goal or target with instep or laces. Goalkeeper fights to get into the proper saving position, balanced, with hands ready. Quick step and change of weight over the inside leg to prepare for a low diving save.
Use your imagination for the progressions and goalkeeper training topics you would like to address. Most important be consistent and confident when distributing hands or feet. Control your body and the ball. Experiment and learn from your successes and mistakes.
Goalkeeper Training Courtesy of Andrew Sparkes, Swansea City FC Academy Goalkeeper Coach. Goalkeeper training drills recorded at International Goalkeeper Coaches Conference. Have questions regarding goalkeeper gloves, training equipment, or goalkeeper training contact GK equipment experts at www.keeperstop.com.
Goalkeeper Tips On How To Take Goalkicks
Keeperstop.com YouTube Video On Goalkicks.
A Break Down and Suggestions On How To Take Goalkicks
Ball Placement:
Avoid mud/dirt patches and divots.
Find an slightly elevated area of grass to place the ball on
By elevating the ball you increase the likelihood of striking through the ball to achieve good height and distance on the kick.
Approach:
After you have found a good placement for the ball, place your non kicking foot directly next to the ball. Your kicking foot should be directly behind the ball.
Now take as many strides as you feel comfortable, back behind the ball. I prefer between 3-6 strides. By practicing with a consistent number of steps back and to the side your body becomes familair with the distance those making your stride more consistent
Now take two strides to the left (if you are right footed) or two strides to the right (if you are left footed). These strides should be a lateral movement so in essence your have created an “L” shape away from the ball. No more than two steps to the side. More than that may create issues with transferring your body weight through the ball.
Approach the ball at a slow jog concentrating on foot placement and ball contact.
It is important not to sprint at the ball as this often leads to poor technique and in turn a poor kick.
What gives the goalkick the height is leaning back slightly more than a shot on goal.
Concentrate on returning your non kicking foot directly next to the ball, and lean slightly back as you aim to strike the ball with your kicking foot.
Ball Contact:
Good ball contact is essential to achieve a good goal kick. We must make good contact on the ball but also with our foot. If we kick the wrong area of the ball or with the wrong part of our foot we will not produce a good goal kick.
The elevated ball placement has allowed us to view the bottom half of the ball more clearly. This is the best strike zone for performing a good kick.
We want to strike centrally on the underside of the ball. Striking under the ball provides us with height and striking centrally gives us a good basis for power.
Now we have a good place to make contact with the ball, we must perfect our foot placement when contacting the ball. It is essential we do not kick the ball with our toes or with our instep and this will produce a poor kick and could lead to injury.
We should aim to make foot contact with our forefoot. This is the area leading from the big toe all the way up to where our foot joins our ankle. (Follow the big toe bone all the way up with your finger to locate this area). This area usually runs parallel to the laces on your cleats.
Angle your foot down to open up your ankle and keep it locked to achieve a good strike.
Follow Through:
The follow through is where we achieve most of the power on our kicks. We must have a good backswing to generate momentum for the kick but striking through the ball and continuing though the ball with your leg provides your power and thus distance.
It is important that your hips also swing through the ball to your target. Your body positioning determines the direction of the ball and also power and distance. It is important to have good strength in your core and hip flexors if you want to achieve a good goal kick. Performing sit ups and stretching well before kicking can actually increase distance and power dramatically.
It is important to control your leg speed when kicking the ball. It is a myth that swinging your leg as hard as you can gives you the greatest power and distance. Excellent technique is what produces a good kick. This means having a controlled back swing and a controlled follow through. If you watch professional goalkeepers, most of them make goal kicks look effortless because they have excellent technique.
A reference to know whether you have performed a good follow though is to find your ending position after the kick. If you have stopped directly on the 6 yard line you may not be getting all the power generated by your body and hip swing. If you find your self leaning or curling to one side you may find the resulting kick also curling to that side which also takes away power and distance. If you have taken several steps through the kick and you are now several yards away from the 6 yard line then more than likely your follow through was good.
Practice makes permanent. Practice with both feet. Through repitition and your attention to the mechanics the body will become more comfortable with the movement.

Simple Exercises for a Goalkeeper to Become Comfortable Using Both Feet
One of the area’s that I find to be a weaker area in goalkeeping for our youth goalkeepers is the ability to strike balls with either foot and the ability to adequately deal with back passes. Often time when I conduct clinics or camps, I find that the goalkeepers just aren’t comfortable striking balls over distance or keeping possession for their team under pressure. This is an area in goalkeeping that I feel is overlooked by head coaches and goalkeeper coaches. In the following article, I have come up with a few ideas and exercises that can help goalkeepers improve their ability to play balls with their feet and deal properly with back passes.
1) Play in 4v4 and small-sided games as much as possible. This is a basic activity you can do as a goalkeeper that is as close to actually being in a full game and using your feet like a field player. Any chance you get to jump in small-sided games with the rest of your team will help improve your field skills. Depending on how the game is set up, you will most likely be playing in smaller spaces with increased pressure and less time on the ball. This will challenge you to play quicker and more accurately and thus improve your foot skills. Concentrate in this setting on having your head up and looking before you receive the ball, the quality of your first touch away from pressure, the pace and accuracy of your pass, and supporting your pass immediately. 4v4 or 5v5 is always a fun and simple way to improve your field skills!
2) Grab another goalkeeper or field player and strike longer balls over a zone to each other. This can be set up by simply dropping 2 lines of cones down about 25-30 yards away from each other. Each of you should stand behind the line of cones and face each other. You can start off hitting a stationary ball and focusing on dropping a ball into your teammates’ hands(or off their chest if they are a field player) in the next zone. The ball should be in the air and clear the zone. Focus on the angle that you approach the ball, hitting through the center of the ball, leaning back, getting underneath the ball, and following through straight at your teammate. This will improve your goal kicks and technical ability.
Once you are consistently hitting good stationary balls, you can do the same exercise, but the ball must be moving. Roll the ball from your hands and hit a moving ball. This will replicate a back pass and be more challenging. Lastly, try to connect with your partner as many passes as you can in 1 minute. Adding the pressure of time and having to hit a moving ball will make this exercise more challenging and game-like. Then move on to doing the same thing with your left foot.
3) Juggling a soccer ball on your own or with a partner. This simple exercise can be done before or after practice. Juggling is a good way to build comfort on the ball and improve your first touch and ability to receive balls. Start off by using your feet only where you have 1 bounce before each touch. Focus on taking little touches with your laces of your foot, hitting through the center of the ball, keeping the ball straight off your foot, and building comfort on the ball with little touches. Then, move on to juggling with any body part without a bounce- keep the ball up in the air with your juggling ability. Another way to challenge yourself if to see if you can strike the ball a little bit higher in the air above your head, then control it with your feet or thighs as it is coming down, then pop it back up again. Repeat this over and over again…small little touches, one big touch up high, and settle with your control and first touch. Lastly, juggle with your other goalkeeper or another teammate. Start off by taking two touches, one to control and one to play back a pass to your teammate. Keep the ball up in the air between the two of you. Next, take 4 touches, 3 to control, and 1 to play to your teammate. Use all body parts this time.
Juggling is a fun and easy way to build comfort on the ball and improve receiving balls.
There are many different aspects that help you become the best goalkeeper you can be. Having great footskills- the ability to receive back passes and be able to strike a ball accurately and quickly is important for any goalkeeper, especially at the higher levels of the game. Don’t neglect this area of goalkeeping and find time in your training regimen to add exercises like the ones above. Have fun!
The Dave Bucciero Goalkeeper Camp will take place on the campus of Boston University. For more information, please go to www.davebucciero.com. (Note from keeperstop.com - great day camp for keepers in and around Boston)
Drills to Develop a Goalkeeper's Confidence with Back Passes
During the last 20 years, we have seen the goalkeeper position evolve and change in many ways. Recent rule changes have changed the role of the goalkeeper and forced goalkeepers to play more balls with their feet in the run of play. It is not uncommon to see a match where a goalkeeper has to deal with more backpasses then shots. We have also seen a tactical change in goalkeeping during the last 20 years. More and more coaches are looking for the “sweeper-keeper” and encouraging goalkeepers to not only play off their line aggressively, but begin attacks by playing balls with their feet. If a goalkeeper is technically sufficient at playing shorter and longer passes, this can be a big advantage for any team. Here are a few ideas on how to improve in this area.
1. With a partner, begin warming up by playing passes back and forth in a 20x10 grid. Focus on playing accurately and quickly in 1 and 2 touches. Make sure you use both legs (receiving and passing). Focus on pushing your first touch in front and to the side of your kicking leg. Make sure your pass is played with enough pace but can be controlled as well. Try to keep your head up as that ball is coming in, and if you can meet the ball, go get it! See how many passes you can connect with your partner in under 1 minute. See if you can beat that score every time you do that exercise! Remember, it is important to play quickly but accurately too.
2. 2 server’s, plus a goalkeeper in goal. 2 servers stand at the outside of the penalty box toward the sideline. 1 ball. A keeper starts exercise in goal by calling for ball and demanding it back. Server then plays back to keeper, who then changes the point of attack with first touch, and finds other server on the other side of the penalty box. It is important for the keeper to meet the ball if he/she can, keep that first touch in front and to the side of the kicking leg, try to keep your head up as that ball is coming in and take a quick look at the other server. Finally, the pass from the keeper should be hit with enough pace and ultimately played slightly in front of the target facing forward (just like an outside back). Once the keeper plays the ball, he/she should follow the pass to show support of the pass. The exercise continues with the server who received the pass playing a ball back to the keeper, who then does the same thing going the other way. This can be done with 5/6 repetitions, but remember that this drill can get fatiguing.
3. Now, from this same exercise, add 3/4 pressuring players from the top of the penalty box, and 2 targets that stand near the center circle, but slightly toward the flanks. Once ball is played in from the one side of the field, 1 attacker tries to win the ball and place pressure on the keeper. The keeper must decide to change point of attack if he/she can, or play a 1-time ball high and wide if under pressure (toward target near center circle.) It is important here that the keeper makes the right decision with the ball. If in doubt, be safe and play ball high and wide. The worst thing that can happen here is for the keeper to lose the ball under pressure to an attacker going to goal. Remember that the keeper needs to meet the ball if possible, and takes the first touch away from pressure if deciding to play in 2 touches. This exercise is very realistic to the game and the pressuring players should press the goalkeepers at different angles and force the keeper to different sides of the field. It is important that the keeper learns to clear balls with their weaker leg too. There will be times when you have to use your weaker leg so get used to kicking with it!
4. To add to this exercise, you could also change the area where the backpasses and pressure are coming from. This is realistic to the game and keepers must feel confident dealing with any type of backpass played from any area.
Those are just a few ideas on how you can improve your technique of dealing with backpasses. Remember to keep working hard to become a better goalkeeper!
Dave Bucciero Goalkeeper camps and clinicswww.davebucciero.com