
 Gloves
 Jerseys
 Gear
Gear
 Brands
Search results
Filter:
29 results
29 results
Drills to Develop a Goalkeeper's Confidence with Back Passes
During the last 20 years, we have seen the goalkeeper position evolve and change in many ways. Recent rule changes have changed the role of the goalkeeper and forced goalkeepers to play more balls with their feet in the run of play. It is not uncommon to see a match where a goalkeeper has to deal with more backpasses then shots. We have also seen a tactical change in goalkeeping during the last 20 years. More and more coaches are looking for the “sweeper-keeper” and encouraging goalkeepers to not only play off their line aggressively, but begin attacks by playing balls with their feet. If a goalkeeper is technically sufficient at playing shorter and longer passes, this can be a big advantage for any team. Here are a few ideas on how to improve in this area.
1. With a partner, begin warming up by playing passes back and forth in a 20x10 grid. Focus on playing accurately and quickly in 1 and 2 touches. Make sure you use both legs (receiving and passing). Focus on pushing your first touch in front and to the side of your kicking leg. Make sure your pass is played with enough pace but can be controlled as well. Try to keep your head up as that ball is coming in, and if you can meet the ball, go get it! See how many passes you can connect with your partner in under 1 minute. See if you can beat that score every time you do that exercise! Remember, it is important to play quickly but accurately too.
2. 2 server’s, plus a goalkeeper in goal. 2 servers stand at the outside of the penalty box toward the sideline. 1 ball. A keeper starts exercise in goal by calling for ball and demanding it back. Server then plays back to keeper, who then changes the point of attack with first touch, and finds other server on the other side of the penalty box. It is important for the keeper to meet the ball if he/she can, keep that first touch in front and to the side of the kicking leg, try to keep your head up as that ball is coming in and take a quick look at the other server. Finally, the pass from the keeper should be hit with enough pace and ultimately played slightly in front of the target facing forward (just like an outside back). Once the keeper plays the ball, he/she should follow the pass to show support of the pass. The exercise continues with the server who received the pass playing a ball back to the keeper, who then does the same thing going the other way. This can be done with 5/6 repetitions, but remember that this drill can get fatiguing.
3. Now, from this same exercise, add 3/4 pressuring players from the top of the penalty box, and 2 targets that stand near the center circle, but slightly toward the flanks. Once ball is played in from the one side of the field, 1 attacker tries to win the ball and place pressure on the keeper. The keeper must decide to change point of attack if he/she can, or play a 1-time ball high and wide if under pressure (toward target near center circle.) It is important here that the keeper makes the right decision with the ball. If in doubt, be safe and play ball high and wide. The worst thing that can happen here is for the keeper to lose the ball under pressure to an attacker going to goal. Remember that the keeper needs to meet the ball if possible, and takes the first touch away from pressure if deciding to play in 2 touches. This exercise is very realistic to the game and the pressuring players should press the goalkeepers at different angles and force the keeper to different sides of the field. It is important that the keeper learns to clear balls with their weaker leg too. There will be times when you have to use your weaker leg so get used to kicking with it!
4. To add to this exercise, you could also change the area where the backpasses and pressure are coming from. This is realistic to the game and keepers must feel confident dealing with any type of backpass played from any area.
Those are just a few ideas on how you can improve your technique of dealing with backpasses. Remember to keep working hard to become a better goalkeeper!
Dave Bucciero Goalkeeper camps and clinicswww.davebucciero.com
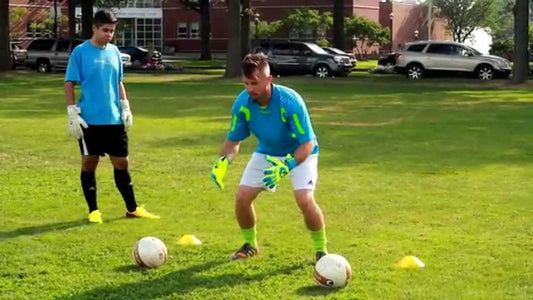
Goalkeeper breakaway drills with goalie diving technique
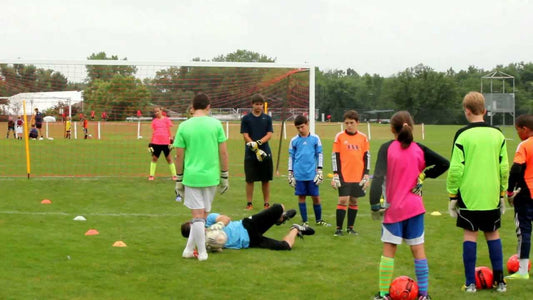
Build the timing and courage of your youth goalkeeper with the Breakaway Alley goalkeeper drill. The goalkeepers range in age from 10 -12. Youth goalkeepers love the game since it is a controlled goalkeeper breakaway drill that is fun and challenging way to instill proper low ball diving techniques, timing, and courage with breakaway saves.
Attacking team: 1 point for every goalkeeper they pass.Goalkeeper team: Switch after a set number of saves.
Keep track of the number of times each team stops the attack as well as points. Switch after the team that is goalkeeping stops the attack a specified number of times. I typically do 12-15. Switch teams from attack to goalkeeping. Obviously the goalkeepers in front will receive more action. Move different goalkeepers up front. Repeat to build confidence and proper technique. Let the goalkeepers try the technique out and challenge themselves before stopping. The coaching points that you see in the video are over a 25 minute progression. Contact keeperstop.com with any goalkeeper training questions or for a goalkeeper clinic near you.
CLICK HERE FOR THE VIDEO
Here are the focus areas of the session:Start from knees – helps the youth goalkeeper to concentrate on a few body mechanics at a time.
Ready position with slight bend on the back
Hands in front of body elbows slightly bent
Drive hands and head to the ball to attack the ball
Hands and arm create a window to protect the face
Goalkeepers drive to the ball landing on their side
Counter balance leg (top leg) into the chest area but doesn’t go past 90 degrees for momentum and to protect the goalkeepers stomach.
From the feet: More challenging since it is a longer way from the ball and it is combining the coordination of upper and lower body.
Same Points as above
Lower hand position wider than legs out in front of the body to be ready for a close range low shot.
Be patient
Stay up as long as possible.
Step low into the inside leg closest to the ball. Drive hands and body to the ball. Watch that the ball doesn’t go under the goalkeeper.
Important to focus on the hand and arm positioning to make sure the goalkeepers face is protected from a foot or the ball.
Be courageous. Trust the technique to protect your body and the goal.
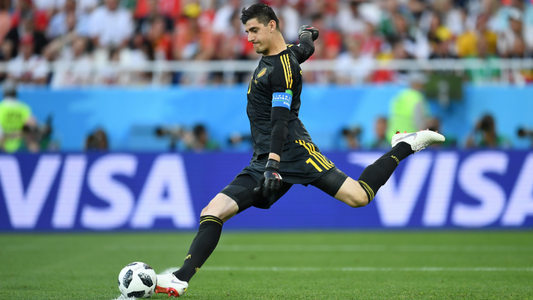
Goalkeeper Tips On How To Take Goalkicks
Keeperstop.com YouTube Video On Goalkicks.
A Break Down and Suggestions On How To Take Goalkicks
Ball Placement:
Avoid mud/dirt patches and divots.
Find an slightly elevated area of grass to place the ball on
By elevating the ball you increase the likelihood of striking through the ball to achieve good height and distance on the kick.
Approach:
After you have found a good placement for the ball, place your non kicking foot directly next to the ball. Your kicking foot should be directly behind the ball.
Now take as many strides as you feel comfortable, back behind the ball. I prefer between 3-6 strides. By practicing with a consistent number of steps back and to the side your body becomes familair with the distance those making your stride more consistent
Now take two strides to the left (if you are right footed) or two strides to the right (if you are left footed). These strides should be a lateral movement so in essence your have created an “L” shape away from the ball. No more than two steps to the side. More than that may create issues with transferring your body weight through the ball.
Approach the ball at a slow jog concentrating on foot placement and ball contact.
It is important not to sprint at the ball as this often leads to poor technique and in turn a poor kick.
What gives the goalkick the height is leaning back slightly more than a shot on goal.
Concentrate on returning your non kicking foot directly next to the ball, and lean slightly back as you aim to strike the ball with your kicking foot.
Ball Contact:
Good ball contact is essential to achieve a good goal kick. We must make good contact on the ball but also with our foot. If we kick the wrong area of the ball or with the wrong part of our foot we will not produce a good goal kick.
The elevated ball placement has allowed us to view the bottom half of the ball more clearly. This is the best strike zone for performing a good kick.
We want to strike centrally on the underside of the ball. Striking under the ball provides us with height and striking centrally gives us a good basis for power.
Now we have a good place to make contact with the ball, we must perfect our foot placement when contacting the ball. It is essential we do not kick the ball with our toes or with our instep and this will produce a poor kick and could lead to injury.
We should aim to make foot contact with our forefoot. This is the area leading from the big toe all the way up to where our foot joins our ankle. (Follow the big toe bone all the way up with your finger to locate this area). This area usually runs parallel to the laces on your cleats.
Angle your foot down to open up your ankle and keep it locked to achieve a good strike.
Follow Through:
The follow through is where we achieve most of the power on our kicks. We must have a good backswing to generate momentum for the kick but striking through the ball and continuing though the ball with your leg provides your power and thus distance.
It is important that your hips also swing through the ball to your target. Your body positioning determines the direction of the ball and also power and distance. It is important to have good strength in your core and hip flexors if you want to achieve a good goal kick. Performing sit ups and stretching well before kicking can actually increase distance and power dramatically.
It is important to control your leg speed when kicking the ball. It is a myth that swinging your leg as hard as you can gives you the greatest power and distance. Excellent technique is what produces a good kick. This means having a controlled back swing and a controlled follow through. If you watch professional goalkeepers, most of them make goal kicks look effortless because they have excellent technique.
A reference to know whether you have performed a good follow though is to find your ending position after the kick. If you have stopped directly on the 6 yard line you may not be getting all the power generated by your body and hip swing. If you find your self leaning or curling to one side you may find the resulting kick also curling to that side which also takes away power and distance. If you have taken several steps through the kick and you are now several yards away from the 6 yard line then more than likely your follow through was good.
Practice makes permanent. Practice with both feet. Through repitition and your attention to the mechanics the body will become more comfortable with the movement.
Soccer Goalkeeper Distribution, Handling, and Diving Drills
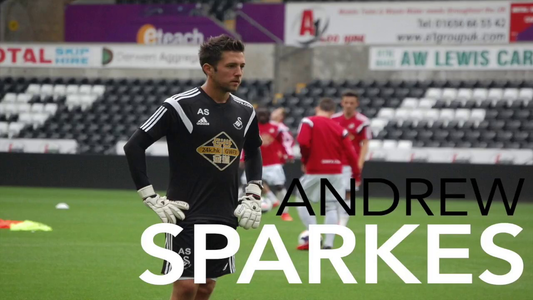
Goalkeeper Distribution Training Progression with additional emphasis on catching and diving. Courtesy of International Goalkeeper Coaches Conference and Andrew Sparkes.
Keeperstop.com Youtube video links that progression a developing goalkeeper through different catching and distribution drills.Goalkeeper Drill 1: Simple and effective bowling distribution exercise with both hands. Goalkeeper recovers in line for a volley. Goalie should focus on quality distribution and then finding the correct line with the server
Progression 2: Goalkeepers distribute to opposite side, find proper angle, and are in ready position early for a shot. Serving goalkeepers working on distribution as well.
Progession 3: Goalkeeper quickly distributes to goal or target. Goalkeeper fights to get into the proper saving position, balanced, with hands ready. Quick step and change of weight over the inside leg helps the body to respond and control the body for the collapse diving save. Leave the save for the next goalkeeper, Restand, and quick footwork out of the way.
Progression 4: Coaching points will still focus on distribution and for this progression low driving saves. Goalkeeper quickly distributes to goal or target with instep or laces. Goalkeeper fights to get into the proper saving position, balanced, with hands ready. Quick step and change of weight over the inside leg to prepare for a low diving save.
Use your imagination for the progressions and goalkeeper training topics you would like to address. Most important be consistent and confident when distributing hands or feet. Control your body and the ball. Experiment and learn from your successes and mistakes.
Goalkeeper Training Courtesy of Andrew Sparkes, Swansea City FC Academy Goalkeeper Coach. Goalkeeper training drills recorded at International Goalkeeper Coaches Conference. Have questions regarding goalkeeper gloves, training equipment, or goalkeeper training contact GK equipment experts at www.keeperstop.com.

Breakaways: Advanced Tactical Considerations and Training Session
I consider the goalkeeper the last defender but for the sake of the article and to eliminate confusion when defender is used in the article it refers to the field player. Also all directions that are talked about in the article are as if you were in the goal so when left is said it is to the goalkeepers left as they are looking down the field.
Many areas can be examined in the 1v1 save: spacing of goalkeeper to back line, attacking player in possession of the ball, 50/50 ball, goalkeeper winning the ball outright, angle and distance the attacking player beats the last defender. I am going to go over the goalkeeper dealing with a forward who has broken down the last defender just outside of the 18 yard box and is attacking the goal while in possession of the ball.
The first area we will examine is the communication and starting spot of the goalkeeper. Once the attacking player is going at the last defender the goalkeeper needs to communicate to the defender which way they should be forcing the attacking player. Generally the goalkeeper wants to force the player further away from the goal. So if they are attacking from the right side of the goal (remember we are talking from the goalkeepers point of view) the goalkeeper would communicate to force the player to the right so if the defender is beaten the attacking player has a tougher angle to attack the goal. If a player is attacking down the center of the field at the youth level if you have not scouted the team and do not know the attacking players dominant foot the goalkeeper should force them to the right as there are less left footed players. Also at the same time the goalkeeper needs to start changing where they are standing in the goal. At this point the goalkeeper should begin to creep out of the goal (walking heal to toe of half steps) anticipating the defender getting beat so they can quickly close down space and possibly eliminate the 1v1 before it even begins.
The second area we will examine is now the defender has been beaten and the goalkeeper has creeped out but the attacking player kept good possession of the ball so the goalkeeper now must close down the space. As soon as the defender has been beaten the goalkeeper must see how far the attacking player has pushed the ball to beat the defender. At this point the goalkeeper must close down space by being in an upright sprint until the attacking player is reestablishing control of the ball. The goalkeeper must be looking at the forwards feet so when they draw back their foot to shoot they must immediately get into their set position so they can stand the shot up or move laterally. How the set position looks will depend on the distance between the goalkeeper and the attacking player if it is below 9 yards they will be in a stalk position anything above this will be a normal set position.
Now we will look at the stalk position. The stalk position is the goalkeeper having their weight on the balls of their feet with their chest slightly forward and legs under the shoulders but not wide enough for the ball to go between them and the hands down at the sides so the fingers are level with the top of the ankle and the palms are facing out and the finger are stretched out and taught. The goalkeeper is in this position because the attacking player is going to be shooting at close range and the goalkeeper is trying to be as big as possible and protect the space in tight to the legs as it is the most difficult spot to get down for a save. If the attacking player has not pulled their shot and continues to dribble in the goalkeeper will close down the space in the stalk position. When closing down the space in the stalk position the goalkeeper should have strides of heal to toe so they can get set quickly. If the goalkeeper is taking big strides and moving to fast when the attacking player pulls back their foot to shoot the goalkeeper will not be in control of their body to get into the proper stalk position.
Next we will look at the goalkeeper sliding through the ball and the attacking players feet to make the game changing save. Once the goalkeeper has gotten into the stalk position and is closing down the attacker they want to slide through the ball in between the attacking players touches. Once they have chosen the proper moment to slide through the ball the goalkeeper from their stalk position will lead with the hand and foot that is closest to the ball. All the weight will transfer to the lead foot and the goalkeeper will be low to the ground and push off this foot to drive through the ball with their hands. The trail hand (the hand further from the ball) will come across and go to the top of the ball while the lead hand will be behind the ball. The head is behind the arms with eyes on the ball and the forearms are there to protect the goalkeepers face. The goalkeeper will be diving into their armpit and hip so that they are a big barrier behind the ball. It is important that the goalkeeper pushes their body through the ball as this will make it much more difficult for the attacking player to cut around the goalkeeper and if anything is not held the ball will have a much greater chance of coming back into their body.
Good luck in your goalkeeping endeavors and hopefully this will help you in making the game changing save!
Mike BristolEclipse Select Elite Goalkeeping Camps
www.eclipseselect.orgPrivate Training call (309)287-1522
Advanced Catching and Diving
During a season, there will be moments within a match when the goalkeeper will be called upon to make the special save. The save will be recorded on the score sheet like any other shot attempt. But to the seasoned professionals, the importance of this save could be the difference between winning and losing, as well as promotion and relegation. The spectacular save not only changes the complexity of the match, but it re-energizes a team and awakens their fighting spirit. Spectators may view this save as “unexpected,” but to the goalkeeper who puts countless hours of training into a week this save is the result of hard work and commitment to their craft.
Through our numerous years of training goalkeepers at SoccerPlus Goalkeeper School, we have come to believe that a goalkeeper’s ability to dive is truly special. Every aspiring goalkeeper who attends the camp has the intention of making that extraordinary diving save, but not every goalkeeper has the athletic ability to fully propel themselves through the air and catch the ball. In addressing this topic of “Advanced Catching and Diving,” the following three saves will be covered: 1. Extension Diving, 2. Parrying, and 3. Tipping Back to the Bar. Furthermore, the article will identify the physical, technical, tactical and psychological implications needed to make these types of saves.
The Diving Saves
Extension Diving: There are two types of diving saves. The more elementary version identified in article 1 is called the Collapse Dive. A collapse dive is when the keeper catches the ball before diving. The other type of dive and the type we are identifying and training is Extension Diving or diving first and catching while flying towards the ball.
This is an explosive save used to cope with shots struck initially outside the reach of the goalkeeper. Using quick footwork, the goalkeeper propels the body through the air and catches the ball in mid-flight. Unlike the collapse dive, the feet are airborne.
Parrying: Deriving from the extension dive; the goalkeeper utilizes one or two hands to redirect the flight of the ball outside the goal. Balls that cannot be caught can be redirected using the fingertips or the heel-of-the-hand.
Tipping Back to the Bar: While using proper footwork to get back to the goal line and having precise timing, the goalkeeper extends up into the air to redirect the ball over the top of the crossbar.
The Four Pillars
Like other players, to examine the goalkeeper’s capabilities to make the dynamic diving save, I will use the “Four Pillars”, which are commonly known as the physical, technical, tactical, and psychological components of the game. Assessment and evaluation of the goalkeeper using the four pillars allows coaches to pinpoint areas of concern, as well as track the amount of progress made in their development. Obviously, higher level goalkeepers possess extraordinary abilities in reference to the four components. In preparation to making these types of saves, goalkeepers must consider the following implications:
Physical
Height – will determine starting position. Smaller goalkeepers will stand closer to the goal line; taller will stand further off the goal line.
Power (explosiveness) – 1) main attribute used to dive for balls struck outside the comfort zone, 2) vertical jump.
Strength – assists with propelling body off the ground, as well as absorbing contact with ground.
Agility – the goalkeeper’s ability to change direction (up/down, side to side, forward/backward).
Foot Speed – main ingredient used to make these saves; sprint, shuffle, cross-over step, and drop-step.
Reaction Speed – quick reflexes.
Flexibility – being limber.
Technical
Extension Dive – take forward step with the foot closest to the ball. Place weight on that leg as you bend. Using your arms and opposite leg, transfer momentum and drive your body towards the ball. Upon catching the ball, continue to drive through the ball while descending towards the ground. The ball should be the first thing to hit the ground, being used to absorb impact while also using the ground to help secure the catch.
Parrying – progression is the same as the extension dive. Being fully extended in the air, the goalkeeper can use two different surfaces of hand to redirect uncatchable shots. 1) Fingertip: used for shots hit soft enough to be redirected around or over the goal. 2) Heel-of-the Hand: used for shots hit too hard to be caught or redirected with the fingers. The heel is the part of the hand at the bottom of the palm, just above the wrist. Use of the heel of the hand will allow the goalkeeper to deflect hard shots with force far away from danger. Avoid trying to slap or stop the ball; make the decision to catch or parry.
Tipping (Back to the Bar) – goalkeeper starts in a sprinter stance. They immediately drop-step and move into a crossover step after reading the flight of the ball towards the goal. At the last moment, they leap off the back foot and drive the closest hand up to the ball. Contact with the ball is made with strong fingertips, using a subtle jab through the center of the ball.
Tactical
Assess the distance and position of the ball to determine vertical and lateral positioning.
Assess whether there is pressure on the ball and which foot the ball is being struck with on goal.
Recognize that if the ball is bouncing, the goalkeeper’s position should be closer to the goal line.
Recognize the approach of the shooter. Usually, a strong/faster approach towards the ball indicates a shot with power; if the shooter slows down, it represents a possible chip.
Weather Conditions – should influence the goalkeeper’s decision to catch, box or parry.
Anticipation – the goalkeeper who reads the game well and anticipates the next touch (pass, dribble or shot) generally arrives in the proper position to make the play sooner.
Psychological
Confidence – goalkeepers must believe that they can make the spectacular save.
Concentration – maintaining focus throughout the match; including stoppage time/overtime. Knowing that at any given moment, they may be called upon to make the special save.
Composure – be relaxed under pressure; embrace the moment.
Courage – this is the biggest hurdle for youth goalkeepers. When learning and training these types of saves, most fear hurting themselves. Also, many youth goalkeepers favor diving to one particular side; they need to address these “mental blocks.”
Training Ethics/Motivation – success is equated with preparation. To achieve and maintain a high level of goalkeeping, you commit yourself to training. Incredible saves should only surprise those who are unprepared to make them.
Without question, saves of this magnitude reverberate for years. To this day, people refer to Gordan Banks’ save on Pele’ during the 1970 World Cup as the greatest save ever made. In the women’s game, the diving save by Brianna Scurry on a penalty kick during the 1996 Olympic Finals set the stage for Brandi Chastain’s winning goal. On the biggest stages, such as the World Cup and Olympic Games, world class goalkeepers will emerge with world class saves. It is this intangible quality that separates them from other players.
George Kostelis is the owner and director of GK Soccer Training and the National Director of the SoccerPlus Goalkeeper School.
Footwork and Handling with Christian Benjamin of Keeperstop.com
Here, Christian Benjamin goes through a series of progressions in footwork and handling with a high school goalkeeper. The progressions are simple to follow and will ensure your goalkeeper improves their footwork, handling, concentration and overall game.Click here for the YouTube video!
Here are the main focus points of the session:
Proper balanced goalkeeper ready position
Slightly bent from the knees and back to load muscles
Hands relaxed and slightly in front to create a connection between eyes and hands
Feet get body and hands to the ball.
Step behind the ball
protect head and hands forward.
Inside Leg is the elevator:
Low ball bend from the knees to get body behind and over the ball.
Don’t just bend over at the hips
Once movement is introduced goalkeeper has to be ready and balanced prior to service. No movement. Loaded and ready!
Encourage cross over steps with longer distance and shuffle for shorter distance and to preparation steps.
All movement is done in an athletic position to be close to the ready position in the event of an early shot. In other words don’t stand all the way up to move. More like sprinters posture off the starting line.
Better to be slightly out of position and ready than in position and still moving.
Balance helps the goalkeeper react high, low, left, and right.
If a goalkeeper is moving the goalkeeper is favoring a direction and will not be able to stop their momentum to change direction.

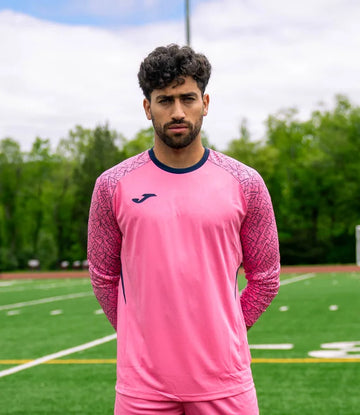
Goalkeeper Equipment For The Heat
How To Beat The Heat As A Goalkeeper: What Equipment To Wear.
Goalkeepers train and play hard that is a given. During the hot summer months it is important to take precautions when training and playing. Turf fields and hard grounds are abusive to the body in best of conditions. Oppressive heat compounds the playing difficulties especially on turf field. Here are a few strategies to help a goalkeeper stay safe.
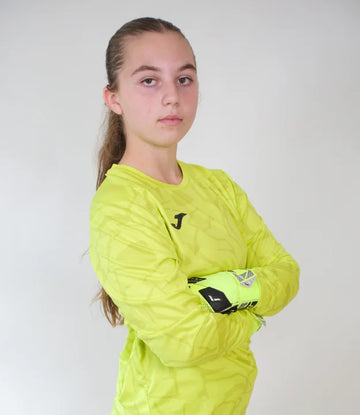
Wear proper goalkeeper equipment. A short sleeve goalkeeper shirt will provide more relief than a long sleeve goalie jersey. We suggest at keeperstop.com to use UV resistant and light weight sweat wicking materials to draw moisture away from the body. Synthetic materials don't retain moisture like natural fabrics do. Try not to double up with a T shirt since it will insulate the body.
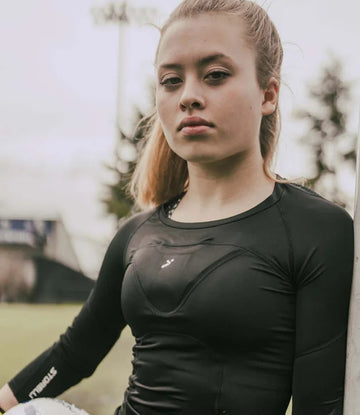
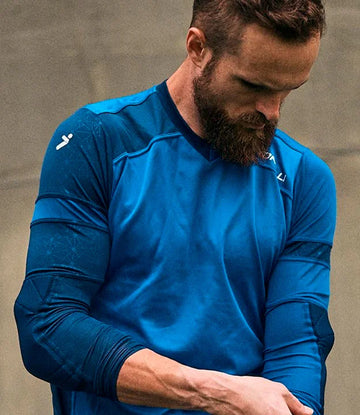
Many goalkeepers wear a goalkeeper protection such as a padded compression shirt to protect the body from the abrasiveness of turf and hard ground. Select a synthetic base layer that incorporates mesh and other breathable materials. Turf can leave unprotected goalkeepers with dangerous cuts and abrasions.
Imagine what hot turf will do to the skin. 90 + degree temperatures may be too hot for goalkeeper camps and games on turf. Wear Storelli arm guards, leg guards, Reusch goalkeeper long socks, and compression shorts to protect high impact sensitive areas.
Hydration should start the night before your training and match. Stay away from sugary or caffeinated drinks that can aid to dehydration. Water is you best resource.
Select times of day to train or play games that are traditionally cooler. Try scheduling games or goalkeeper training in the early morning or at night.
Call or email keeperstop.com with any questions proper soccer goalkeeper equipment for camps or summer training.
Goalkeepers Tactical Considerations When Dealing Crosses
Though the goalkeeping position has evolved through the years, dealing with flank crosses still remains a facet of the position that goalkeeper’s are constantly evaluated upon. Even though the game is played differently in each domestic league, functionally preparing goalkeepers to intercept crossed balls is a skill of the utmost importance. Whether the game is a youth or professional match, goalkeepers must be readily prepared to come off their goal line and deal with crosses into the penalty area. Especially during higher level matches, goalkeepers can often be scrutinized for not controlling the penalty area and flailing at balls that should have been won. The task of handling crosses has grown increasing more difficult due to the player’s ability to serve balls with more velocity, spin and accuracy. In preparation, the technical ability of the goalkeeper must be sound, but the overall effectiveness of the goalkeeper will truly lie in their tactical positioning and decision making.
Keeper or AwaySimply, goalkeepers need to recognize quickly whether they can win the ball. Without hesitation or self doubt, they need to assess the situation and communicate effectively whether they are committing themselves to winning the cross. The common terminology used throughout the United States is “keeper” or “away”. Both terms are used to clarify the goalkeeper’s intentions; the “keeper” call means the goalkeeper is committed to winning the ball, and the “away” call means they are staying in the goal. Communicating loudly and concisely alleviates any misconceptions for the defenders in their attempt to clear the ball.
Intercepting the BallAt the SoccerPlus Goalkeeper School, we illustrate the use of the High Contour Catch to secure balls above the head. This technique is essentially used to catch balls above an opponents challenge while intercepting crosses. Elevation towards the ball is created by flexion in the knee and an arm swing to transfer momentum upward. This movement enables the goalkeeper to approach the ball with more dynamic strength and balance while attacking the ball. The elevated knee is used to protect the goalkeeper, as well as keep the opponent away from the ball.
Boxing the BallNot every crossed ball into the penalty area will be caught. Goalkeepers are faced with the decision to box balls when under heavy pressure from the opponent. Boxing or punching the ball usually occurs when there is extreme pressure and congestion within the penalty area that hinders the goalkeeper’s ability to elevate safely to intercept the ball. Sometimes, boxing may occur because the goalkeeper may have initially misjudged the ball and is now scrambling to catch up to it. In either event, boxing is a skill that must be trained and utilized to win crossed balls.
Boxing Tips:
Elbows and arms are comfortably close to the body.
Contact with the ball is made by using a short driving motion (extension of the elbow joint); not a long “roundhouse” swing.
Wrists are firm and rigid.
Use clenched fist(s).
Box through the low center of the ball.
Box for height, distance, width and accuracy.
When in doubt, box it out!
Boxing Guidelines:
When the goalkeeper is moving forward towards the ball, box with two hands back in the general direction of the service.
When moving forward toward the near post, never box across the front of the goal.
When the ball is driven toward the far post, continue the flight of the ball in the direction of the serve by boxing one-handed (use the hand closest to the ball).
If contact with opponent is imminent, box the ball; avoid contact when possible (less risk of injury).
Use boxing to intimidate the opposition. Players dislike having a fist brush closely by them.
Technical Considerations
Stance: The feet are shoulder-width apart with the knees slightly bent, and the weight is on the balls of the feet. The body is relaxed in a “training bounce” (slight bounce in place) with the arms bent around chest height.
Open Stance: the body position of the goalkeeper is slightly more open to the field of play. This position allows for more field vision and provides an easier transition to win balls struck at the far post. This stance is primarily used to handle long services.
Closed Stance: the body position of the goalkeeper is square to the service. Primarily used for short crosses; this allows the goalkeeper to attack balls easier struck in the front half of the goal.
Take Off FootworkOne of the primary ingredients needed for goalkeepers to win crosses. When moving towards the ball, the goalkeeper should utilize small, quick steps with the last step being longer. If the ball is being served from the left side of the goal, the goalkeepers take off should be with their left leg while elevating the right knee for protection (and vice versa if the ball is served from the right). The only exception is when the goalkeeper boxes to continue the flight of the ball. Therefore, if the ball is served from the right, the goalkeeper will take off their left leg while elevating their right knee.Drop Step/Cross-over: These two forms of footwork are commonly used to maneuver the goalkeeper in retrieving balls played across the face of the goal. The drop-step allows the goalkeeper to adjust their body shape, while the cross-over step is used to cover ground. Typically, they are used in conjunction when handling balls played to the far post.
Starting PositionIn establishing an effective starting position to cope with flank play, goalkeepers must consider how far they can play off their goal line, yet still protect the goal. Finding the appropriate starting position emerges through experimentation during training sessions. By seeing a number of crosses from different distances and angles, goalkeepers gain tactical awareness and knowledge that usually transcends into the game. Considering there are various crossing situations, the starting position of the goalkeeper will fluctuate depending on the position of the player with the ball. However, there are other factors that may influence the goalkeepers starting position.The physical attributes or limitations of the goalkeeper; height, jumping ability, quickness, speed…etc.Distance of the cross. The farther the ball is away from the goal, the goalkeeper can position themselves vertically higher off the goal line and laterally toward the middle or back third of the goal; the closer the ball is to the goal, the goalkeeper’s vertical position is nearer to the goal line and laterally toward the near post.Depth of the cross. When the opposing player is positioned to serve the ball from the end line, the goalkeeper can adjust their vertical position further away from the goal line. Due to the reduced shooting angle, the probability of the shot is limited; therefore, the goalkeeper can look to extend their starting position. However, the goalkeeper must be cognizant of the misplayed ball that veers towards the goal.In-swinging or out-swinging crosses. Pending on switch foot or side the ball is being served from, the goalkeeper needs to adjust their starting position accordingly. In-swinging (closer to the goal line) / Out-swinging (farther off the goal line).Reading the angle of approach of the opposing player. Here are some tactical cues that may influence the starting position of the goalkeeper:
If the preparation touch is diagonally towards the goal, their body position allows them to shoot, serve balls along the ground or flight balls to the far post.
If the preparation touch is straight in front of them, they will be forced to kick across their body which hinders the power and accuracy of the cross. These crosses usually fall short or may be lofted.
If the preparation touch is towards the sideline, the probability of this ball being served well is less; usually, this ball falls short of the near post.
Tactical ScenariosMost youth goalkeepers are accustomed to handling the ordinary cross or corner-kick. These crossing situations are the most prevalent and recognizable tactical features in the youth game. At the SoccerPlus Goalkeeper School, we assist the tactical development of students by illustrating the 2-goal and 3-goal situations that occur during matches. Through demonstrations and diagrams, we provide a frame of reference to the students by making these situations more identifiable. Enhancing the tactical knowledge of the goalkeeper through training match related situations is a necessity. The goalkeeper’s ability to read the situation, position themselves correctly and make the right decision is parallel to success.
2-Goal Situation – Attacking Implications
Short length cross; just outside the width/length of the penalty area.
Low driven bending ball; can be an out-swinging or in-swinging serve.
Usually, the ball is sent in early behind the defense.
Highly congested penalty area; defenders tracking runners into the box. Primary runs are made to near and far post areas.
Own goals often occur; defenders trying to redirect the ball away from the goal.
Guidelines to Handling the 2-Goal Situation
Closed stance.
Starting position is off the goal line in the front or middle part of goal.
Take a direct path to the ball; be aggressive and brave in your approach.
Look to win the ball in front half of the goal; intercepting or boxing.
If holding the position, anticipate first time shots, flicks and deflections.
3-Goal Situation – Attacking Implications
Opposing player penetrates the penalty area on the flank.
Opposing player has an acute shooting angle; has options to cross.
Timing runs are being made into the penalty area; near, middle and far post.
Balls can be played hard to the near post, pulled back to the trail runner, or flighted to the far post.
Usually, a one-touch finish is used by the striker.
Guidelines to Handling the 3-Goal Situation
Closed set stance.
Starting position of the goalkeeper is one step in front of the near post.
Priority is the “first goal” (the actual goal); must protect the goal from being scored upon at the near post.
Next priority is the “second goal” (near post to the top of the goal box). If a ball is served, can the goalkeeper intercept or deflect the pass. If the ball is unreachable, the goalkeeper must foot-work across the goal and plays the point blank shot.
Final priority is the “third goal” (the space behind the goalkeeper). If the chipped/ flighted ball can not be intercepted or tipped out of danger, the goalkeeper must use the fastest method of foot-work to get across the goal to save the shot.
The bottom line is the game demands the goalkeeper be capable of handling crosses. Handling crosses needs to be an integral part of the goalkeepers training regimen. There is no shortcut; confidence and consistency in the goalkeeper is groomed on the training pitch.
George KostelisWestern Connecticut State University, Men’s Head Soccer CoachFounder & Director, GK Soccer TrainingNational Director, SoccerPlus Goalkeeper School
For more information, contact George Kostelis at george@gksoccertraining.com or visit www.gksoccertraining.com.

Breakaway Basics
A breakaway occurs when the attacker with the ball has penetrated the last defender. The goalkeeper becomes the only opposing force available to stop the attacker from dribbling the ball into the net. The save requires a great deal of courage, but it is a key game situation that can leave the goalkeeper with total respect from his teammates and a frustrated opposition. Knowing the proper methods and practicing them can help improve your odds of success.
There are three stages at which the save can be made in a breakaway situation.
The first, and best, is before the shot is taken.
The second, is during the process of the shot being taken.
Finally, if the shot cannot be prevented or stopped in progress, it must be saved after it has been taken. This is the least favorable option.
To deal with the breakaway situation the goalkeeper must rely on the following visual cues: the speed and angle of the ball, the speed and location of the first attacker, and the presence and location of any other attackers. The keeper should also consider the nature and conditions of the game prior to the breakaway. Who's ahead? By what margin? How much time is remaining? What are the field conditions? Who has the momentum? How skilled is the attacker with the ball? Is there a defender closing in?
The save can become a foot race if the lead pass to the attacker is too strong or if the attacker's first touch is too far ahead of her. The keeper can get to the ball before the shot is taken in this case. The save that is made during the shot is a smother save. The keeper smothers the ball at the shooter's feet before the shooter can get off the shot. The final type of save requires knowing which way to dive and reloading quickly.
There are some areas to consider when making the breakaway save. The first is to look for visual cues that the attacker is providing and mirror them. If the attacker is coming at speed then the goalkeeper must respond at speed. Likewise, if the opponent is attacking with patience, then the goalkeeper should respond with patient defense. Often when patient, the ball will find its way to the keeper, because the attacker will run out of time before making a good decision.
The goalkeeper should also master the concepts of angle play and correct positioning. This can be practiced with a logical progression of intensity. The first phase of training should start with no pressure. Then the second phase should contain some, but not all, of the competition to build the keepers confidence and ensure they are using the proper technique to protect themselves, the ball, and covering the best angle. The final phase should be as close to match conditions as possible.
To ensure that the keeper is protected it is important that they have the grass cutter or low ball save technique mastered. Driving the hands low and through the ball, catching the ball out in front of the body, arms crooked, and arms parallel will create the barrier to protect the face behind. The mid section is protected by the top leg and knee, which is also used for momentum during the dive and to reload to a standing position. Keepers that are not confident in breakaways or the grass cutter technique will often slide in leading with their knees or feet. Not only does this expose a significant amount of the goal, reduce the likely hood of controlling the ball, it also exposes the face and often results in harsh collisions. As a keeper takes the power step to lower the body and hands during a breakaway save they are driving to and through the ball with their body weight giving the keeper the advantage in force in the event of a collision.
A final note...The goalkeeper's primary focus should always be on the ball, not on the opponent's eyes. React don’t anticipate. Stay up as long as possible. Force the attacker to make a good shot.
The Ball Doesn’t Lie!
About Coach Christian Benjamin:Christian is the owner of keeperstop.com; Central Connecticut Mens Assistant and Goalkeeper Coach; CT Olympic Development Staff and Goalkeeper Coach; Director for Star Goalkeeper Academy; as well as goalkeeper coach for high school, premiere, maple, town, and college goalkeepers in MA, CT, NH. NSCAA National Goalkeeper Diploma and USSF C.
Questions or comments are welcome - contact www.keeperstop.com
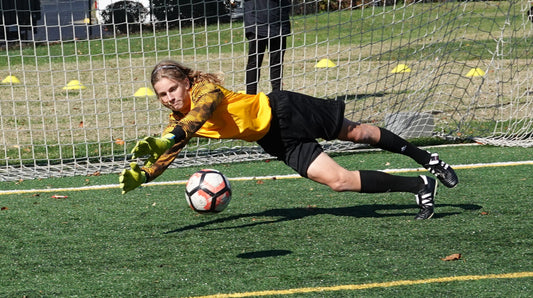
Goalie Drills For Blocking and Diving
Breakaway Saves
One on One Situations - When To Win and When To Block?
The soccer penalty box is busy these days with strikers and defenders. The opportunity and decision to save or attack a free ball can be milliseconds. These Youtube goalkeeper training drills are warm up activities to help the goalie develop coordination to activate the hands, body, and feet. To stay balanced and ready to make the decision to dive for a ball or stay up and patient to block a shot. To encourage bravery within youth and developing goalkeepers on 50/50 and smother saves.
Definitions: Block - create a barrier to block a shot. Hands, body, and feet can all make the save. Harder shots closer to the feet can be saved by the feet. High shots can be saves by body or the hands. Blocking doesn't have to be at the point of the shot. Blocking can be utilized from 1 to 5 yards when the shot is hard and the hands don't have enough time to control the save. Smother Save - The point when a shooter and goalkeeper are both arriving at the ball at the same time. 50/50 ball. Goalkeepers dive at the shooter's feet, shooting their hands too and through the ball, driving the arms at the ball to "smother" the save on the striker's foot or body with the goalkeepers core muscles and momentum. A type of breakaway one on one save. Attack and Win - Recognize the ball is free in space off of a pass or touch. Take the necessary action employing a variety of techniques to gain control of the ball or deflect out of danger.
Progressions:
Activating hands and feet from knees: Set Up: cones 3-4 feeat apart depending on the size of the goalkeeper. 2 soccer balls. Handful of tennis balls. Goalkeeper coach or servier 4 feet away. Accuracy of speed of service is important. Idea is to increase coordination of hands, feet, and body. Services can build as comfort level and familiarity build.
Balanced neutral ready position. Hands in front wider than body. Hands and feet are in play. Stay up as long as possible.
Tennis ball toss to develop hand eye coordination. Feet and hands come up together to create a larger blocking area.
Active hands and feet. Concave body shape.
Shots at feet - block with leg or foot.
10 services with tennis ball or soccer ball each side. 2 X each side
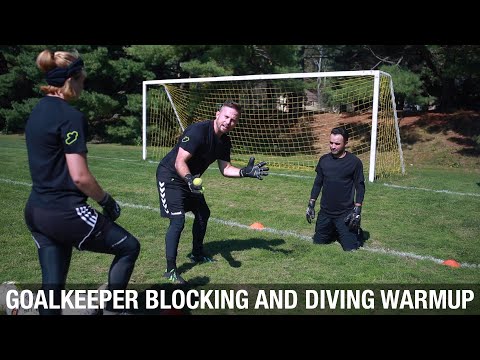
Blocking and Diving Warm Up: Time - 1:30
Set Up: Two target areas. 3 - 4 feet depending on size and age of goalkeeper for the harder down the middle shot. 1-2 feet side channel for 50% services for diving saves. Cone distances are for accuracy of service as well as for the goalkeepers to visually see the range they can cover with each technique. 6 to 8 services each side. Build timing and confidence of the goalkeeper by starting with one side. Harder services to challenge the technique on each side. Goalkeeper coach or server can build from the simpler single sided service to decisions and reactions on either side.
Neutral and balanced to react to service.
Hands wider than body width with bent arms.
Active hands and feet for harder shots down the middle. Services should be hard and close enough not too allow the goalkeeper to simply scope.
Quick step to position body weight effectively drive hands, head, and body laterally for diving save.
Don’t guess react with a dive or a block.
Try not to fall back.
3rd Decision, Ball In Space - 3:15Incorporate a pass into space for the goalkeeper to recognize the loss of control, big touch, or pass. If the goalkeeper can attack the ball and win it in space than make the quick decision and go for it. Now there are three techniques to use the decisions and reactions of the goalkeeper may be slower. With repetition the speed of decisions and reactions will increase. Increase the speed and deception with the goalkeeper's comfort level.
Special Thanks for Storelli Sports Goalkeeper equipment and protection as well as Hami from HK_Goalkeeping_1.
Contact keeperstop.com in the USA for goalkeeper equipment and education, training drills, or camps.